
ringyo
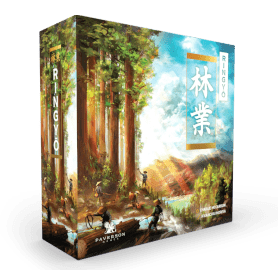 林業 (Ringyō), which translates to 'forestry' in English, blends simultaneous worker placement, environmental management, and competitive strategy into an immersive experience that rewards foresight, adaptability, and respect for the natural world. Only the daimyō who accumulates the most favor after five rounds will be celebrated as the Shōgun’s favored lord.
Spēlētāju skaits: 1
Spēles ilgums: 38 mn
Sarežģītība: 3 / 5
Spēlē ringyo un 1340 citas spēles tiešaistē.
Nekas nav jākačā - spēlē pa tiešo no pārlūka.
Ar saviem draugiem un tūkstošiem spēlētāju no visas pasaules.
Par brīvu.


Spēlē ringyo un 1340 citas spēles tiešaistē.
Nekas nav jākačā - spēlē pa tiešo no pārlūka.
Ar saviem draugiem un tūkstošiem spēlētāju no visas pasaules.
Par brīvu.
Noteikumu kopsavilkums
Ringyō
In Ringyō, players act as Daimyos to manage the forest in the province of feudal Japan. They manage their Province (their personal player board) to grow and harvest trees, build structures, and fulfill demands. The game is played over 5 rounds, and the player with the most Honor Points (HP) at the end of the game wins.
Each round consists of 4 phases:
- Edo Phase: Secret card selection to determine turn order and draft round bonuses (Shogun's Gifts).
- Province Phase: Simultaneous worker placement to plant, grow, cut trees, harvest rice, and construct buildings.
- Weather Phase: Weather effects are resolved, triggering tree growth, rice harvesting, and flooding throughout the province.
- Demands Phase: Spending resources to claim scoring spots on shared demand tiles. (There is no Demands phase in solo mode.)
Sequence of a Round
Phase 1: Edo Council Phase (Turn Order & Drafting)
Players bid to establish turn order and draft Shogun's Gifts:
- Play Diplomat: Players secretly choose one of their 6 Diplomat cards (valued #1 to #6). Playing the #6 card requires paying 2 Rice.
- Draft Gifts:
- At the beginning of each round, gift cards are dealt to the shared Edo board.
- In solo mode, the 1-2 cards provide access to the rightmost gift card. 3-4 provide access to the middle and right gift card. 5-6 provide access to all 3 gift cards.
- Used diplomat cards remain face up on the table and cannot be played again for the rest of the game.
Province Phase
Players simultaneously place workers on open intersections (junctions where 3 land areas meet) to activate adjacent land areas. Workers may then take 1, 2, or 3 actions in adjacent area. Each worker may only take 1 action in each adjacent area (e.g. you cannot cut and then plant in the same space)
Worker Types
- Yellow Samurai: Permanent worker (returned to you at round end). Can take an action in 2 adjacent areas.
- Green Samurai: Upgraded permanent worker. Can take an action in 3 adjacent areas.
- Artisans: Temporary worker (returned to the supply at round end). Can take an action in 2 adjacent areas.
- Villagers: Temporary worker (returned to the supply at round end). Can take an action in 1 adjacent area and is limited to basic actions only.
Actions (Max 1 action per worker per adjacent area)
- Plant (Basic - All Workers): Add a height-1 tree of the matching area type to an empty or flooded land area.
- Grow (Basic - All Workers): Add 1 segment to a tree in that land area (max height 5).
- Cut (Basic - All Workers): Harvest all segments of a tree in that land area, placing the wood in your storage.
- Harvest (Basic - All Workers): Gain 1 Rice from a Rice Paddy land area (or 2 Rice if a Farm is built on it).
- Create Rice Paddy (Artisans/Samurai only): Flip a flood token in that land space to its Rice Paddy side.
- Build (Artisans/Samurai only): Construct a structure by paying wood segments of the matching tree type from your storage.
- Muster (Samurai only): Gain 2 military tokens (must be performed at a Fortress).
- Study (Samurai only): Examine an adjacent tree of matching type and height to meet your next Forestry Track requirement, advancing your marker and gaining the indicated rewards.
Special Actions (No worker required, can be done at any time)
- Split: Divide a stored tree segment into smaller segments.
- Join: Pay 1 Rice to combine stored segments of the same tree type.
- Hire: Pay 2 Rice to gain a temporary Villager worker.
- Expand: Spend 3 military tokens to draw a bonus land tile and add it to your board, creating new intersections.
- Foresee: Spend 1 research token to peek at one of the unrevealed Weather cards for the round.
- Shogun's Favor: In solo mode, Shogun's Favor cards are used to discard the current solo goal and move to the next one.
Building Rules
In order to build, you must have the exact indicated trees types and sized in your personal storage (shown on your building board). The bottom row of structures are available at the start of the game. Building structures unlocks building adjacent structures above or next to previously built structures. When building, place a token from your Structure board into the activated land area. Completing a row, column, or certain adjacent structure tiles from the building board provides a bonus indicated.
- Fortress: Must be built in an empty land area. Generates 1 military token at the start of each Weather Phase and unlocks the Muster action.
- Farm: Must be built on top of a Rice Paddy. Doubles rice production during Harvest or the Weather Phase.
- Row costs: Building on the top 3 rows of your province have an additional rice cost indicated on the board.
Phase 3: Weather Phase (Growth & Floods)
- Fortresses: Gain 1 military token for each built Fortress.
- Resolve Weather Cards: Reveal Weather cards one at a time. Each card matches a tree type (as indicated or as forecast on the forecast card) and triggers one of two events:
- Rain:
- All trees of that type grow by 1 segment (max 5).
- Rice Paddies produce 1 rice
- Farms produce 2 rice.
- Flood: Empty or flooded areas of that type gain a flood token.
- Rain:
- Cascades: If a land area would gain a second flood token, it cascades down-slope. One flood token slides diagonally downwards to an adjacent lower land area based on the Forecast card.
- A flood cannot cascade into an already flooded land area.
- If a flood cascades onto a tree, rice paddy, or structure, that tile is removed from the province.
Endgame Scoring
At the end of Round 5, players calculate their total Honor Points:
- Structures Built: HP printed under each built structure on your Structure Board (including those destroyed by floods).
- Trees in Province: Cumulative HP based on levels unlocked on your Forestry Track (e.g., +1 HP per tree of height 4+ / 3+ / 2+).
- Demands: HP from your completed Shogun's Demands
- Favor Cards: HP from up to 3 completed personal goal cards.
The highest score wins. Ties are broken by the player who completed the most demands.
Solo Mode Rules
Solo Phases
- Council Phase Drafting: Your diplomat card limits which of the 3 face-up Gifts you can draft:
- #1 or #2 Diplomat: Draft the right-most gift.
- #3 or #4 Diplomat: Draft the middle or right-most gift.
- #5 or #6 Diplomat: Draft any of the three gifts.
- Fulfilling Demands: The Shogun's demands are placed around the solo board, with 4 Shogun's demands face up (and 4 to be revealed later). Fulfill demands at any time during your turn by paying resources. You can only fulfill a demand tile that is adjacent/linked to the Samurai's current position. Fulfilling a demand moves the Samurai to that tile, places your token, and flips adjacent linked demands face-up.
- Scoring Goals: In the center of the solo board, there are 10 solo goals. At the start of the game, one is active, one is revealed as the next solo goal, and the remaining 8 are face down under the "next" solo goal. The active solo goal can only be scored when the Samurai is standing on an outer demand tile. If your Province meets the goal requirement, score it (4 HP), move the Samurai back to the center of the Solo Board (re-opening all face-up demands), and reveal the next goal.
- Winning Condition: Beat the Target Score at the end of the game:
- Target Score = (10 HP × Fulfilled Demands) + (20 HP × Unfulfilled Demands) + (2 × Value of your unused diplomat card).
- Hard Mode: Uses the B-side Solo Board with fewer connections between demands and quadruples the unused diplomat card penalty.